Migration
This page describes how to move your WhosOn installation from one machine to another.
This guide is designed for WhosOn 2019 but will be generally compatible with WhosOn 2018 as well, for WhosOn 2016 you can find an old version of the guide here: https://www.parkersoft.co.uk/forum/forum_posts.asp?TID=6786&title=moving-whoson-to-another-server
Backups
The first step will be to backup any existing configuration, this is to ensure you can roll back should any changes need to be made to the live environment.
To perform a backup of the WhosOn services it would be recommend to take a machine snapshot and a database backup.
To be more specific backup the following file locations on the WhosOn server:
- The WhosOn installation path, default: C:\Program Files (x86)\WhosOn Installable
- The WhosOn settings path, default: C:\ProgramData\Parker Software\WhosOnV7
Thirdly, create a backup of your WhosOn database, to do this follow general SQL server guidance on creating database backups: https://docs.microsoft.com/en-us/sql/relational-databases/backup-restore/create-a-full-database-backup-sql-server?view=sql-server-ver15
Prepare the new environment
It is recommended to update your existing environment to the latest release of the WhosOn server prior to migration.
If you are unable, or unwilling to update your live environment to the latest version of WhosOn you can still proceed with a migration but you will need to ensure that you have the WhosOn installation file for your existing version. If you do not have this you can contact our support team and we may be able to locate the same or a suitable alternative for you: support@parkersoftware.com
- With your WhosOn installation file, install WhosOn onto your new environment, see the installation guide for more details: Server Installation
- When you reach the database setup, link this new install to a new database, we will use this for testing.
- With the installation complete, please test your new WhosOn setup: Testing
Migrate
With the new environment fully functional we can now prepare to move your current live configuration and data to the new environment.
If you are migrating to a new SQL Server please review guidance from Microsoft about best practices for moving databases from one SQL Server to another. In this scenario, you can skip step 1 below.
- In the current live environment, stop the WhosOn services.
- In the new environment, stop the WhosOn services.
- Go to Server Settings -> Database and click Configure.
- Configure WhosOn to use the desired production database. You will be prompted that the database already exists, do you want to use it, click Yes.
- In the new environment still, close the WhosOn Service Manager.
- Relaunch the WhosOn Service Manager and log in.
- Start the WhosOn services.
- Perform another set of testing: Testing
- Your migration is complete.
Sanity testing
This section describes how our support team tests new WhosOn installation for general functionality:
- Ensure all WhosOn services are running. The best way to do this is by opening Task Manager -> Services, and checking that the following services are running:
- WhosOnServer
- WhosOnGlobalGateway
- WhosOnBotServer
- Access the WhosOn Service Manager and access the Log tab, look for any red text lines (these are errors) if you receive errors and are unsure of their meaning or impact, please contact support: support@parkersoftware.com
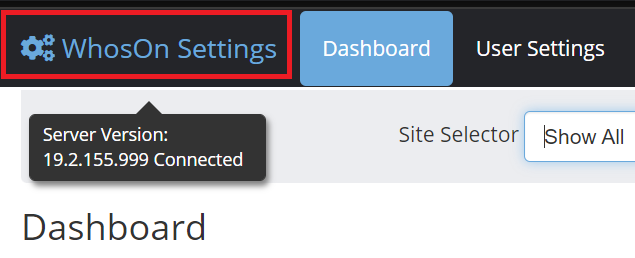
- Access and log into the Settings Portal, hover over the WhosOn settings logo in the top left and ensure it says it is "connected"

- Create a user in the Settings Portal and ensure it has access to a site.
- Test that you can log into the web client.
- In the Settings Portal access the test page for a site, ensure the chat button loads. Chat Designer -> Look and Feel -> View Test Page. This button will open a new webpage. On this page check for the presence of a chat button.
- Use the chat button on the test page.
- ensure that you can start a chat and send message from both the operator and visitor side. Use the webclient for this.
- Access the Data Portal, ensure that you can log in {server}/data
- As you have already tested the chat, check the Chat Sessions view in the Data Portal to ensure that your chat session and its content is present.
- As you have the test page open, ensure you can see yourself in the Active Visitors area of the Data Portal
- Check that the webcharts loads {server}/whosoncharts/ and log into here, ensure no errors appear and the page loads
- Log into the desktop client using the user you created in step 4, ensure no errors appear
- In the desktop client go to Sites -> select your site and ensure that you can see your visit session in the Active Visitors list.